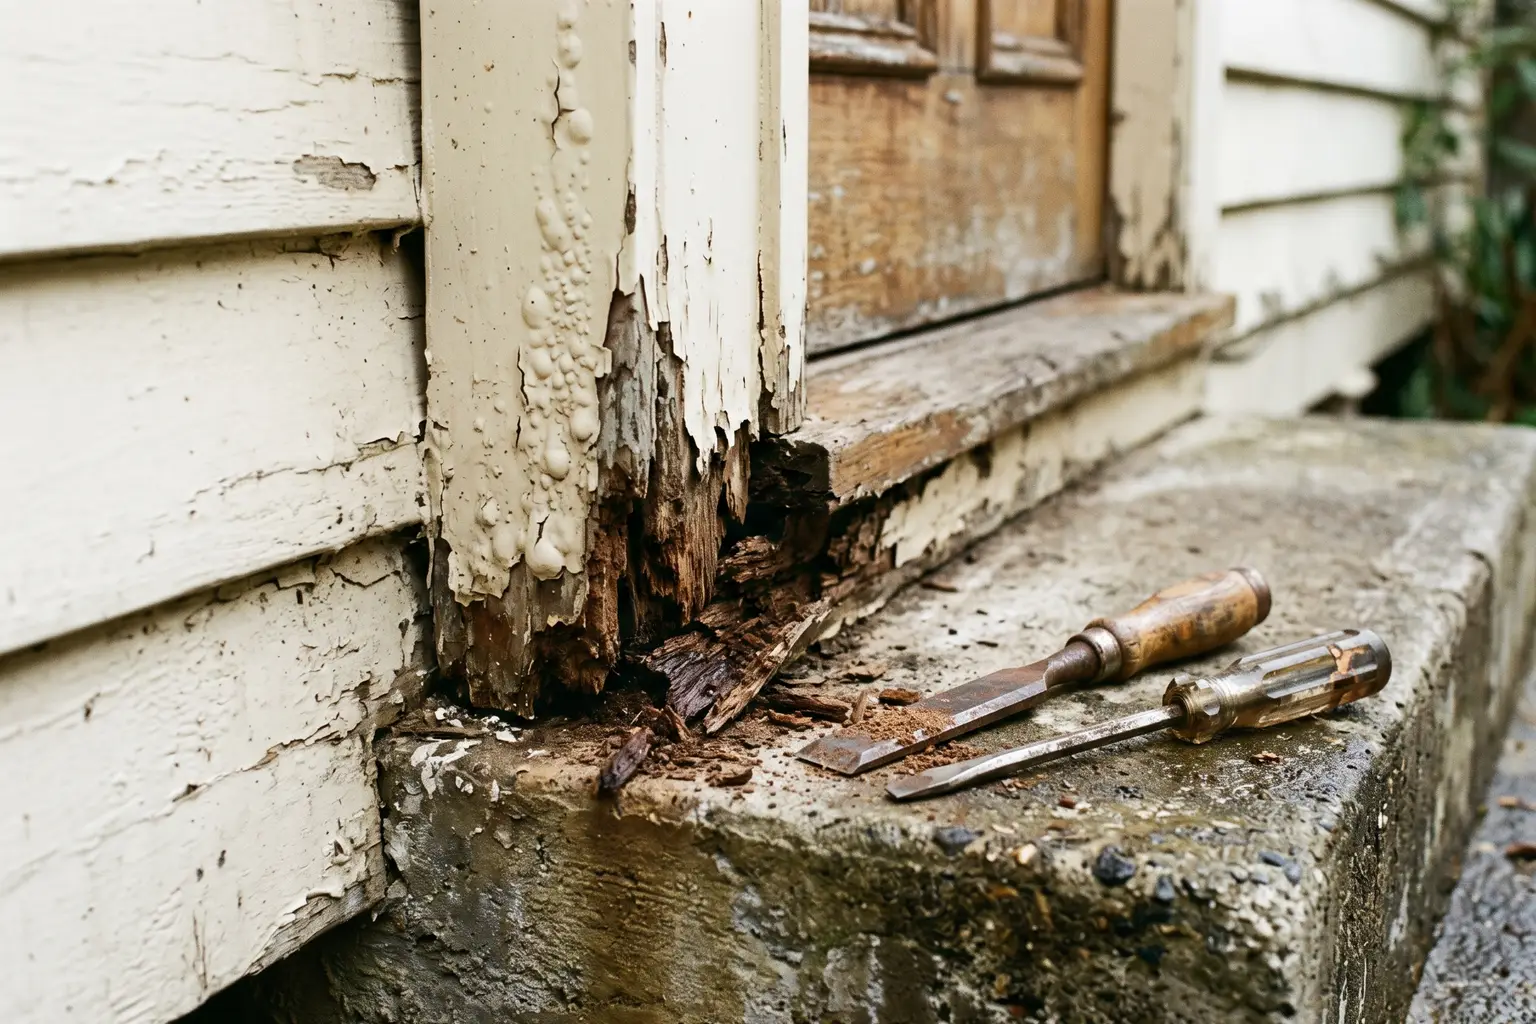
The back door at a weatherboard place in Thirroul had been painted twice since the frame started rotting. You could see it in the layers once I got a chisel into it. Whoever painted it had filled the soft bit at the bottom of the jamb, sanded it smooth, painted over it, and two years later done the same thing again a bit higher up.
The door itself was fine. It was solid, it swung, the lock worked. It was the frame it hung in that had gone, and only the bottom 300mm or so of it on the hinge side. Everything above that was sound timber.
That's the usual shape of a door frame rot job, and it's why it's worth understanding before someone quotes you a whole new door and frame for what is often a half-day repair.
Why the bottom of the jamb goes first
Water runs down. It runs down the face of the door, down the frame, and it ends up at the bottom of the jamb where it meets the sill or the step. End grain sits there, and end grain drinks. The paint cracks first at that joint because the timber moves there, and once water is in behind the paint film it can't get out again. The top of the frame is dry and fine while the bottom quietly goes to compost.
On Illawarra houses there are three causes that account for nearly all of it:
- No drip or weather bar. Older back doors often have nothing to throw water clear of the bottom of the frame, so it tracks straight down into the joint.
- A step or path poured above the sill. A concrete path laid later, sitting level with or higher than the sill, holds water against the timber every time it rains. Very common on post-war places where the yard's been concreted since.
- Splash. A downpipe discharging next to the door, or a gutter overflowing above it, soaks the bottom of the frame from the outside.
Southern and western doors cop the worst of it, same as the window frames on the same walls, because that's where the rain comes from.
Door frame rot repair: what it involves
A rotten door jamb is repaired by cutting out the rotten section and splicing in a new one, not by replacing the frame. The rest of the frame stays, the door stays, and once it's painted you shouldn't be able to see where the join is.
The job in order:
- Find where the rot stops. A screwdriver into the jamb every 50mm or so, working up from the bottom. Sound timber stops the tip dead. I keep going until it does, then go another hand's width above that, because the edge of rot is never where it looks like it is.
- Cut the jamb square. The door comes off, and the rotten leg is cut through at the line, straight and square so the new piece lands clean.
- Check the sill and the stud. This is the moment the job either stays small or doesn't. If the sill under it is soft it comes out too. If the stud behind the jamb has gone, that's framing and it's a bigger repair.
- Splice in new. A new length of jamb, in treated pine or a hardwood to match, fixed to the stud with the joint glued and pinned. The profile gets matched to what's there, and on the older places round here that often means running it rather than buying it.
- Seal the end grain, and fix the cause. Primer on every cut end before it goes in, a proper seal at the sill joint, and a drip or weather bar if there wasn't one. Then the door goes back on and gets checked for clearance, because a new jamb leg is usually straighter than the one it replaced and the door can catch.
Done that way it's often a morning's work, and it sits with the other things on a doors and windows visit.
When the frame really does need replacing
Splicing stops making sense when the rot is in more than about a third of the frame, when it's in both legs and the head, or when the frame is a thin steel-clad or finger-jointed one that won't take a repair. At that point a new frame, pre-hung with a new door, is quicker and comes out better.
The other case is the wall. If the bottom plate or the stud beside the door has gone, the jamb was only the visible part. That's the same repair I described on the termite damage post, minus the termites: prop, cut the plate and stud back to sound timber, new framing in, then the jamb goes on afterwards. On a weatherboard house the boards next to the door are usually soft too by then, which is its own repair or replace decision.
I'd rather tell you that at the first look than halfway through. So the first thing I do at any rotten jamb is the screwdriver, all the way up and then into the wall beside it.
What people try first, and why it doesn't hold
Filler. It's what the previous painter at Thirroul had done, twice, and it's what most people reach for because the soft patch looks small. Filler over rot does two things: it hides how far the rot has gone, and it traps the moisture that's causing it. Two years later the filler is sitting proud on a jamb that's gone soft another 100mm higher.
The other one is a new door. A door that catches at the bottom or won't latch gets blamed on the door, and someone hangs a new one into a frame that's moving because its bottom has rotted out. Sorting the frame first is the fix. I've written up what actually goes into hanging an internal door and the same holds outside: the frame decides how the door behaves.
The Thirroul door
Hinge-side jamb cut at about 350mm, sill sound, stud sound once I'd got the lining off to check. New leg in treated pine, profile matched to the existing, joint glued and pinned, end grain primed, a weather bar fitted across the bottom of the door that had never had one. Door back on, one hinge packed to bring it square. Half a day, and the owner painted it that weekend.
If you've got a back door frame that's soft at the bottom, a door that's started dragging, or paint bubbling at the base of a jamb anywhere between Helensburgh and Nowra, ring Dave on 0414 007 351 or send through a photo. I'll tell you honestly whether it's a splice, a new frame, or a wall.
Want a hand with this at your place? Get a free quote or call 0414 007 351.